Ever felt that pang of dread right before hitting "install" on a new game or software, wondering, "Will my PC even run this?" Or maybe you've eyed a killer deal on a new graphics card, only to pause, unsure if it’ll play nice with your current setup. Perhaps the allure of squeezing every last drop of performance from your system with overclocking has crossed your mind. Navigating the intricate world of system requirements, hardware compatibility, and overclocking can feel like deciphering an ancient language, but it doesn't have to be.
This guide is designed to transform you from a hesitant PC user into a confident hardware maestro. We’ll demystify the specs, illuminate the path to seamless upgrades, and even cautiously explore the thrilling frontier of pushing your components beyond their factory settings. Get ready to understand your machine better than ever before.
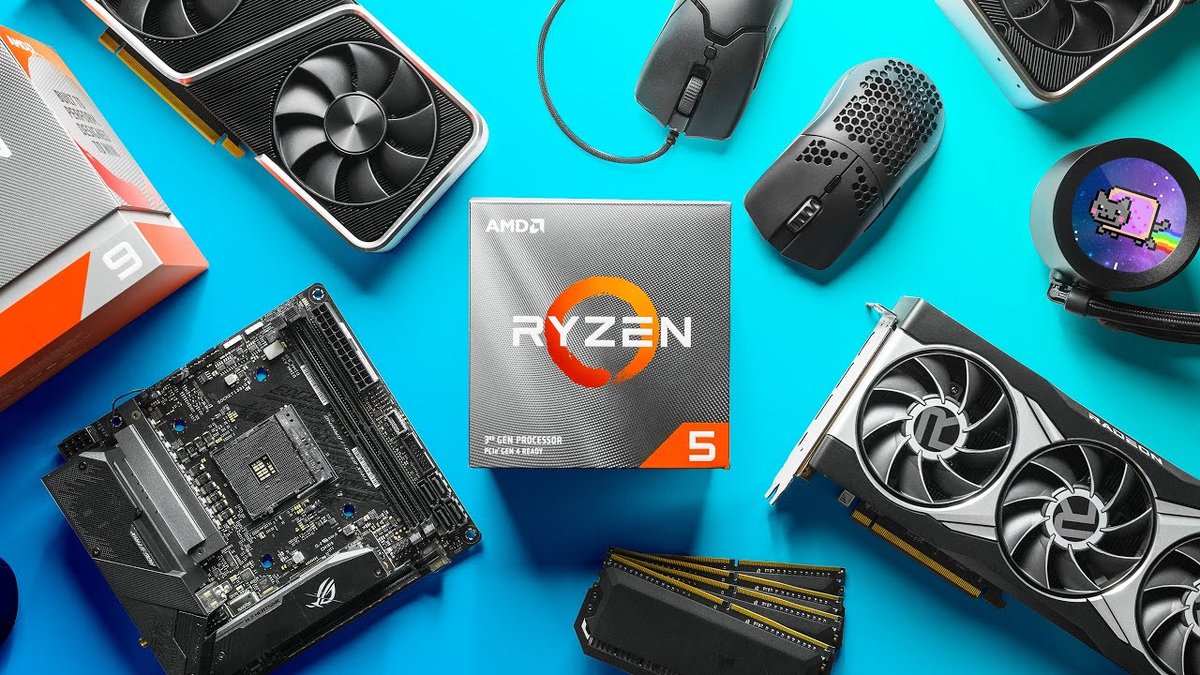
At a Glance: Key Takeaways for PC Performance
- System Requirements aren't suggestions, they're maps: Understand minimum vs. recommended to manage expectations and avoid frustration.
- Know your PC's DNA: Regularly check your CPU, GPU, RAM, and storage specs to make informed decisions.
- Compatibility is king: Not all parts play well together. Motherboard sockets, RAM types, and power supply wattage are critical considerations.
- Bottlenecks are real: A powerful GPU can be throttled by an older CPU, creating an imbalance.
- Overclocking offers free performance: But it comes with risks like instability, increased heat, and potential component degradation if not done carefully.
- Tools are your friends: Use utilities like System Requirements Lab and WillItBottleneck to analyze your system and plan upgrades.
- Small upgrades can make a big difference: Sometimes, a RAM boost or an SSD swap is all you need for a noticeable performance bump.
Decoding System Requirements: Your PC's Report Card
Every piece of software, from the latest blockbuster game to professional video editing suites, comes with a list of system requirements. These aren't just arbitrary numbers; they're the developer's way of telling you what kind of hardware and software configuration your computer needs to even function, let alone perform optimally. Ignoring them is like trying to fit a square peg in a round hole – frustrating, often futile, and potentially costly.
Minimum vs. Recommended: What's the Real Difference?
It’s crucial to understand the distinction between these two categories:
- Minimum Requirements: This is the absolute bare minimum your PC needs to launch and run the application. Expect low frame rates, reduced graphical fidelity, and potentially choppy performance. Meeting minimum specs means the software will work, but don't expect a premium experience. Think of it as merely getting the car to start and move, not winning a race.
- Recommended Requirements: This is where you want to be for a smooth, enjoyable experience. Meeting these specs typically means stable frame rates, higher graphical settings, and an overall more fluid interaction. If the minimum gets the car moving, the recommended specs let you cruise comfortably, maybe even push it a bit on the highway.
Understanding this helps manage your expectations. If your PC barely scrapes by the minimum, you might need to temper your hopes for maxed-out settings and buttery-smooth gameplay.
The Core Pillars: What Specs Actually Matter?
When looking at system requirements, you'll consistently see a few key components mentioned:
- Processor (CPU): The "brain" of your computer. It handles all the general computation. A higher clock speed and more cores generally mean better performance, especially for multi-threaded tasks.
- Graphics Card (GPU): For anything visually intensive, the GPU is paramount. It renders images, videos, and game worlds. A powerful GPU is the single most important factor for gaming performance.
- RAM (Random Access Memory): Your PC's short-term memory. More RAM allows your system to handle more tasks simultaneously and load larger assets without constantly accessing slower storage.
- Storage (HDD/SSD): Where your operating system, programs, and files live. An SSD (Solid State Drive) is significantly faster than a traditional HDD (Hard Disk Drive), drastically improving load times and overall system responsiveness.
- Operating System (OS): Windows versions (10, 11), macOS, or Linux. Compatibility with the specific OS version is often overlooked but critical.
- DirectX/API Version: Graphics APIs like DirectX (for Windows) and Vulkan enable software to communicate efficiently with your GPU. Ensure your system supports the required version.
Knowing Your Own PC's DNA
Before you can compare your system to any requirements list, you need to know what you're working with.
Quick Checks in Windows:
- CPU & RAM: Right-click "This PC" (or "My Computer") > "Properties." Or, press
Windows Key + Pause/Break. - GPU: Right-click on your desktop > "Display Settings" > "Advanced Display Settings" > "Display adapter properties" (Windows 10). Or, open Device Manager (
Windows Key + X> "Device Manager") and expand "Display adapters." - Storage: Open "This PC" to see drive letters and remaining space. For type (HDD/SSD), use Task Manager (
Ctrl + Shift + Esc) > "Performance" tab > click on "Disk" entries.
While Windows' built-in tools offer a basic overview, for a comprehensive, jargon-free report, consider an automated solution.
The "Can I Run It?" Lifesaver: System Requirements Lab
This is where tools like System Requirements Lab (SRL) shine. Since 2005, SRL has provided a simple, one-click solution to answer the age-old question: "Can I Run It?"
Here’s how it works: You visit their website, select the game or application you're interested in, and with a single click, their technology (powered by "Instant Expert Analysis") scans your computer's hardware and system software. It then generates a detailed report, component by component, comparing your specs against both the minimum and recommended requirements.
Why it's so helpful:
- Instant Analysis: No need to remember your exact CPU model or GPU VRAM. It does the heavy lifting.
- Clear Breakdown: Each component (CPU, GPU, RAM, etc.) is individually evaluated.
- Upgrade Suggestions: If a component doesn't meet the requirements, SRL often recommends specific upgrades or updates. Sometimes, a free software download (like a driver update) is all you need.
- Safe & Private: It only evaluates hardware and system software, collecting no personally identifiable information.
- Broad Compatibility: Works across Windows 7-11 and major browsers.
This service is invaluable for peace of mind, allowing you to accurately assess your system's readiness for new software without the guesswork.
The Art of Hardware Compatibility: Making Your Components Play Nice
Understanding hardware compatibility goes beyond just checking individual specs; it's about ensuring all your PC's internal parts work harmoniously. You could have the world's most powerful CPU, but if it doesn't fit your motherboard, or your power supply can't fuel it, it's just an expensive paperweight.
The Motherboard: Your PC's Central Nervous System
The motherboard dictates much of your system's compatibility:
- CPU Socket: CPUs are designed for specific socket types (e.g., Intel's LGA 1700, AMD's AM5). A CPU will only fit a motherboard with the correct socket.
- Chipset: This is a set of components on the motherboard that manages data flow between the CPU, RAM, storage, and peripherals. Different chipsets support different CPU generations, RAM speeds, and PCIe versions.
- RAM Slots: Motherboards specify the type of RAM (DDR4, DDR5), the maximum speed (MHz), and capacity they support. Using faster RAM than your motherboard or CPU can handle will simply default to a lower speed.
- PCIe Slots: These slots are for graphics cards, NVMe SSDs, network cards, and more. Ensure you have the correct PCIe generation (e.g., PCIe 4.0 or 5.0) and sufficient lanes for your high-performance components.
RAM Compatibility: More Than Just Quantity
Beyond the amount of RAM, consider:
- DDR Version: DDR4 and DDR5 are not interchangeable. You must match the DDR version to your motherboard.
- Frequency (MHz): Higher frequencies mean faster data transfer. Your motherboard and CPU have limits. Enable XMP (Extreme Memory Profile) or DOCP (DRAM Overclocking Profile) in your BIOS to ensure your RAM runs at its advertised speeds.
- Channels: Most motherboards support dual-channel memory. Installing RAM in specific slots (often alternating colors) allows for faster performance.
- Latency (CAS Latency - CL): Lower CL numbers are generally better, though frequency often has a larger impact on real-world performance.
Storage Interfaces: Speed and Convenience
- SATA: The traditional interface for HDDs and 2.5-inch SSDs. Slower but widely compatible.
- NVMe (Non-Volatile Memory Express): A much faster protocol designed for SSDs, typically connecting via a M.2 slot on your motherboard. If your motherboard has M.2 slots, ensure they support NVMe drives. Some M.2 slots might only support SATA M.2 drives, which are slower.
Power Supply Unit (PSU): The Unsung Hero
An often-overlooked component, the PSU is critical. It must provide enough wattage to power all your components and have the correct connectors.
- Wattage: Calculate your system's total power draw (online calculators help) and choose a PSU with sufficient headroom (20-30% more than your estimated peak draw).
- Efficiency Rating: 80 Plus Bronze, Gold, Platinum, Titanium indicate how efficiently the PSU converts AC power to DC, reducing wasted heat and electricity bills.
- Connectors: Ensure your PSU has all the necessary connectors for your CPU (4/8-pin EPS), GPU (6/8-pin PCIe), motherboard (24-pin ATX), and SATA devices.
Cooling Considerations: Keeping Your Cool
Powerful components generate heat. Adequate cooling is essential for stability and longevity.
- CPU Cooler: Stock coolers are fine for basic CPUs, but high-performance CPUs, especially when overclocked, require aftermarket air coolers or All-in-One (AIO) liquid coolers. Ensure the cooler's mounting bracket is compatible with your CPU socket.
- Case Fans: Good airflow within your case helps dissipate heat from all components. Consider intake and exhaust fan placement.
- Thermal Paste: Essential for efficient heat transfer between the CPU/GPU and their respective coolers.
The Bottleneck Dilemma: When One Component Holds Back Another
A "bottleneck" occurs when one component limits the performance of another, more powerful component. For instance, a cutting-edge graphics card paired with an ancient CPU might not perform at its full potential because the CPU can't feed it data fast enough. This is a classic hardware compatibility issue in terms of performance.
Identifying bottlenecks can be tricky. You might see low GPU utilization while gaming, or your CPU might constantly be at 100% while your GPU idles. Tools like WillItBottleneck.com can give you an estimate of potential bottlenecks based on your selected CPU and GPU combination, offering a helpful starting point for analysis. It allows you to simulate different component pairings and understand where your system might be underperforming.
However, remember these are estimates. Real-world performance varies based on the specific game or application, resolution, and graphical settings. Running monitoring software (like MSI Afterburner with an OSD overlay) while gaming provides the most accurate picture of your individual system's performance metrics, including CPU and GPU utilization.
For example, troubleshooting specific game crashes, like those detailed in our Fix Marvel Rivals crashing guide, often starts with understanding your hardware compatibility and ensuring no component is unexpectedly underperforming or overheating, leading to instability.
Pushing the Limits: Understanding Overclocking
Once you've mastered understanding your system and ensuring smooth hardware compatibility, the world of overclocking opens up. This is the practice of increasing a component's clock speed beyond its manufacturer-set default, thereby boosting its performance. It’s like turning a dial to get more speed out of an engine.
What Can You Overclock?
The most commonly overclocked components are:
- CPU (Central Processing Unit): Boosts general processing power, beneficial for demanding applications and games.
- GPU (Graphics Processing Unit): Increases frame rates in games and speeds up graphically intensive tasks.
- RAM (Random Access Memory): Can reduce latency and slightly improve overall system responsiveness, though gains are often less dramatic than with CPU/GPU.
Why Overclock? The Appeal of "Free" Performance
The primary motivation is a performance uplift without buying new hardware. A modest overclock can yield a noticeable increase in frame rates or faster task completion, extending the life or enhancing the capability of existing components. For enthusiasts, it's also a challenging and rewarding hobby, a way to truly optimize their system.
The Risks: Proceed with Caution
Overclocking isn't without its downsides. It's a balancing act:
- Instability: Pushing too far can lead to system crashes, blue screens of death (BSODs), or application errors.
- Increased Heat: Higher clock speeds and voltages generate more heat. Inadequate cooling can lead to thermal throttling (where the component slows itself down to prevent damage) or, in extreme cases, permanent damage.
- Reduced Lifespan: While modern components are robust, consistently running them at higher temperatures and voltages could theoretically reduce their long-term lifespan.
- Warranty Void: Most manufacturers will void your warranty if they detect evidence of overclocking that led to component failure.
- Power Consumption: An overclocked system will draw more power, leading to slightly higher electricity bills.
Essential Tools for a Safe Overclock
Before you start, you'll need:
- Monitoring Software:
- CPU-Z / GPU-Z: For detailed information about your hardware.
- HWMonitor / HWiNFO: To track temperatures, voltages, and clock speeds in real-time.
- MSI Afterburner (for GPU): Industry-standard tool for GPU overclocking, fan curve control, and on-screen display (OSD) for monitoring while gaming.
- Stress Testing Software:
- Prime95 / Cinebench (for CPU): To test CPU stability.
- FurMark / Unigine Heaven/Superposition (for GPU): To stress test your GPU.
- MemTest86 (for RAM): To check RAM stability.
Basic Steps to Overclocking (General Principles)
1. CPU Overclocking:
- BIOS/UEFI Access: Restart your PC and repeatedly press the Delete, F2, or F10 key (depending on your motherboard) to enter your BIOS/UEFI settings.
- Voltage Control: Start by slightly increasing the core voltage (Vcore) in small increments. This provides the necessary power for higher frequencies.
- Multiplier Adjustment: Incrementally raise the CPU multiplier (e.g., from x40 to x41).
- Stress Test: After each adjustment, boot into Windows and run a stress test (e.g., Prime95 for 15-30 minutes) while monitoring temperatures. If stable and temperatures are acceptable, repeat the process.
- Back Off: If you experience crashes or excessively high temperatures, reduce the multiplier or voltage.
- Integrated Graphics Considerations: If your CPU has integrated graphics, you might also be able to overclock its frequency.
2. GPU Overclocking (Easier Entry Point): - Software Utility: Use a tool like MSI Afterburner.
- Core Clock & Memory Clock: Incrementally increase the "Core Clock" (for the GPU processing unit) and "Memory Clock" (for the GPU's VRAM) in small steps (e.g., +10 MHz at a time).
- Fan Curve: Adjust your fan curve to be more aggressive to manage increased heat.
- Voltage (Optional/Advanced): Some utilities allow voltage adjustments for GPUs, but this is for advanced users.
- Stress Test/Benchmark: Run a demanding game or a dedicated GPU benchmark (e.g., Unigine Heaven) after each adjustment, watching for artifacts, crashes, and temperatures.
3. RAM Overclocking (Often XMP/DOCP): - Enable XMP/DOCP: This is the safest and most common form of RAM "overclocking." In your BIOS, simply enable the XMP or DOCP profile for your RAM. This automatically sets your RAM to its advertised speeds and timings.
- Manual Overclocking: More advanced users can manually adjust RAM frequency, timings (CL, tRCD, tRP, tRAS), and voltage. This is often complex and offers minimal real-world gains compared to simply enabling XMP.
Safety Tips for Overclocking: - Start Small: Make tiny incremental changes.
- Monitor Constantly: Keep an eye on temperatures and voltages.
- Stress Test Thoroughly: Don't assume stability after a few minutes.
- Good Cooling is Non-Negotiable: Ensure your CPU and case have adequate cooling.
- Research Your Specific Hardware: Every CPU, GPU, and motherboard behaves differently. Look up guides for your specific components.
- Save Your Settings: Before making changes in the BIOS, save your current stable profile.
Overclocking can be rewarding, but it requires patience, careful monitoring, and a willingness to learn. Don't rush it, and prioritize stability and component longevity over chasing a few extra MHz.
Building Your Next PC or Upgrading Smartly
Whether you're starting fresh or giving your current machine a facelift, understanding system requirements, hardware compatibility, and overclocking empowers you to make intelligent decisions.
Define Your Use Case: What's Your PC For?
- Hardcore Gaming: Prioritize a top-tier GPU, a powerful CPU, ample fast RAM, and a fast NVMe SSD.
- Content Creation (Video Editing, 3D Rendering): Focus on a high-core-count CPU, plenty of RAM (32GB+), fast NVMe storage, and a capable GPU.
- Productivity & Web Browsing: A modest CPU, 8-16GB RAM, and an SSD will provide a snappy experience. Integrated graphics are usually sufficient.
- Streaming: Requires a strong CPU (or a good GPU with hardware encoding capabilities), plenty of RAM, and fast internet.
Budgeting for Components: Where to Allocate Your Funds
Your budget heavily influences your build. Here's a general guideline for prioritizing:
- Gaming: GPU > CPU > RAM > Storage > Motherboard > PSU > Case.
- Content Creation: CPU > GPU (if heavily relying on GPU acceleration) / RAM > Storage > Motherboard > PSU > Case.
- General Use: SSD > CPU > RAM > Motherboard > PSU > Case > GPU (integrated).
Prioritizing Upgrades: Maximizing Impact
Not every upgrade yields the same bang for your buck.
- Still on an HDD? Upgrading to an SSD is often the single most impactful upgrade for overall system responsiveness, reducing boot times and application loading.
- Less than 16GB RAM? Jumping from 8GB to 16GB, especially if you multitask or game, can significantly reduce stuttering and improve fluidity.
- Older GPU for Gaming? Upgrading your graphics card will provide the most significant frame rate boost in games, assuming your CPU isn't a severe bottleneck.
- Older CPU/Motherboard? This is often the most expensive upgrade, as it typically requires a new CPU, motherboard, and potentially new RAM (due to socket/DDR version changes). Save this for when other upgrades no longer suffice.
Future-Proofing vs. Diminishing Returns
Aiming to "future-proof" your PC can be a money pit. Technology evolves rapidly. Instead, focus on building a system that meets your needs for the next 2-4 years, with a reasonable upgrade path. Spending significantly extra for the absolute bleeding edge often yields diminishing returns, as those components will still be surpassed relatively quickly. A balanced approach is usually best.
Common Questions & Misconceptions
Let's clear up some common doubts.
"Does my old monitor matter for a new GPU?"
Yes, absolutely! A powerful new GPU will still only output as many frames as your monitor can display (its refresh rate) and at the resolution your monitor supports. If you get a 4K-capable GPU but have a 1080p 60Hz monitor, you won't see the benefit of 4K resolution or high refresh rates until you upgrade the monitor.
"Do I really need the recommended specs for gaming?"
Not always, but it largely dictates your experience. Meeting minimums means playable, but often with compromises on visual quality and smoothness. Recommended specs are the sweet spot for an enjoyable experience. If you're on a tight budget, aim for the recommended CPU and RAM, and then the best GPU you can afford.
"Is overclocking always worth it?"
For most casual users, probably not. The performance gains are often incremental for the effort and potential risks involved. For enthusiasts, gamers seeking every last frame, or those looking to extend the life of slightly older hardware, it can be very rewarding. Always weigh the benefits against the risks.
"Can I mix and match RAM brands?"
Technically, yes, if they are the same DDR version, speed, and ideally, capacity. However, it's highly recommended to use matching RAM modules (same brand, model, speed, and timings) to ensure optimal stability and performance, especially when running in dual-channel mode or attempting to enable XMP/DOCP profiles. Mismatched RAM can lead to instability or slower performance, as modules will often default to the lowest common denominator.
"Is a high-wattage PSU always better?"
Not necessarily. While having sufficient wattage is crucial, an excessively high-wattage PSU won't make your PC faster. It simply offers more overhead. Focus on getting a PSU that comfortably meets your system's needs with about 20-30% headroom, and prioritize efficiency (80 Plus rating) over raw, unnecessary wattage.
Your Path Forward: Confidence in Your PC Journey
You've just navigated a comprehensive tour of system requirements, hardware compatibility, and overclocking. You now possess the knowledge to confidently assess your PC's capabilities, plan smart upgrades, and even, should you choose, cautiously unlock extra performance.
Remember to leverage the powerful tools available, like System Requirements Lab, for quick checks, and WillItBottleneck for deeper insights into component synergy. Always prioritize stability and research before making significant changes or investments. Your PC is a powerful tool, and with this newfound understanding, you're better equipped to wield it. Happy computing!